A successful main bathroom renovation comes down to three things: planning the layout and budget before any demolition starts, getting the invisible work right (waterproofing, ventilation, plumbing, and electrical), and choosing finishes you will still love in ten years. Get those right and the beautiful features take care of themselves. Get them wrong and even the most expensive tile cannot save the project.
Your main bathroom is the hardest-working room in the house. It is the first space you use every morning and the last one at night, and it packs plumbing, electrical, ventilation, and waterproofing into the smallest footprint of any renovation. That is exactly why bathroom projects produce more surprises per square foot than any other room, and why the right preparation matters so much.
After renovating bathrooms across Toronto for more than 32 years, we have organized everything we have learned into ten practical tips, grouped by project phase, so you can use this as a working checklist from the first sketch to the final walkthrough.
Phase 1: Before You Touch a Wall
1. Design the Layout Around How You Actually Use the Room
Start with function, not finishes. Walk through your morning routine and be honest about the friction points. Do two people need the sink at the same time? Do you ever use the tub, or would a spacious walk-in shower serve you better? Where does wet laundry, makeup, and medication actually live? The answers determine whether you need a double vanity, a tub at all, or more storage than you think.
Keeping the toilet, sink, and shower close to their existing positions saves thousands in plumbing work. Moving fixtures is sometimes worth it, but do it as a deliberate design decision, not an afterthought.
Watch out: Clearances are where DIY layouts fail. Doors that clash with vanities, toilets squeezed against walls, and shower doors that cannot fully open all come from planning on paper without checking real measurements.
2. Set a Realistic Budget and Protect It with a Contingency
Underbudgeting is the single most common reason bathroom renovations stall. Your budget needs to cover materials, labour, permits, fixtures, and disposal, plus a contingency of 15 to 20 percent for what is found behind the walls. In older Toronto homes that can mean galvanized or corroded plumbing, outdated wiring, or previous repairs that were never done properly.
Decide your splurge-and-save strategy up front: invest in the things that are hard to change later, such as the shower, waterproofing, and vanity, and save on elements that are easy to swap, such as mirrors, hardware, and accessories. For current price ranges by project scope, see our full breakdown of how much it costs to renovate a bathroom.
3. Confirm Permits and Approvals Before Demolition
If your renovation moves plumbing, alters electrical circuits, or changes walls, you will likely need a permit from the City of Toronto. Cosmetic swaps like replacing a vanity or retiling generally do not. Skipping required permits can void insurance coverage and create problems when you sell.
Condo owners have an extra step: most Toronto condo boards require renovation applications, insurance certificates from your contractor, and approved working hours before any work begins. If that applies to you, our Toronto condo renovation team handles board approvals and building rules as part of the project.
4. Order Materials Early and Finalize Every Selection Before Demo Day
Tile, vanities, glass enclosures, and specialty fixtures can take weeks to arrive, and a renovation that starts before materials are confirmed is a renovation that will sit half-finished waiting for a backordered faucet. Lock in every selection, from grout colour to towel bar placement, before demolition starts. Changing your mind mid-build is the most expensive way to make design decisions.
Phase 2: The Work Behind the Walls
5. Treat Waterproofing as the Foundation of the Entire Project
Nothing matters more than keeping water where it belongs. A proper waterproofing membrane in the shower area, correct slopes toward drains, and sealed transitions are what separate a bathroom that lasts twenty years from one that grows mould behind the tile in five. This work is invisible on the day of the final reveal, which is exactly why inexperienced renovators cut corners on it.
Watch out: Tile is not waterproof. Grout and tile are the decorative layer; the membrane behind them does the real work. If a quote seems too cheap, waterproofing is usually where the money was saved.
6. Do Not Compromise on Ventilation
Your main bathroom generates steam twice a day, every day. An undersized or badly ducted exhaust fan leads to peeling paint, warped doors, foggy mirrors, and eventually mould. Choose a quiet fan sized to the room, vent it outside rather than into the attic, and consider a humidity-sensing model or timer switch so it runs long enough after every shower. We cover fan sizing and placement in detail in our guide to bathroom ventilation mistakes and how to fix them.
7. Layer Your Lighting Instead of Relying on One Ceiling Fixture
A single ceiling light creates shadows exactly where you do not want them. A well-lit main bathroom layers three types: task lighting at face height beside the mirror for grooming, ambient lighting for general use, and accent lighting, such as a dimmable fixture over the tub or LED strips under a floating vanity, for the relaxing evening version of the room. Put key lights on dimmers so the same bathroom works at 6 a.m. and 11 p.m. Our bathroom lighting guide walks through placement and fixture choices room by room.
8. Choose Materials for Moisture First, Looks Second
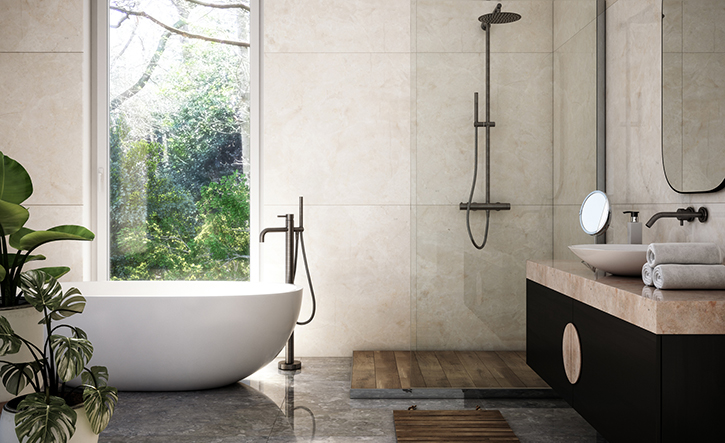
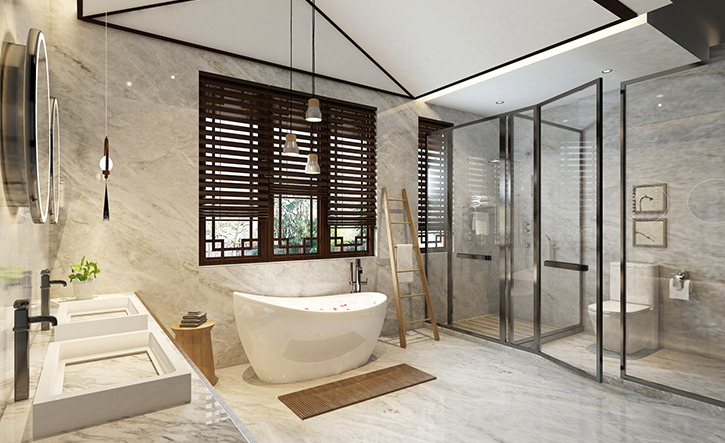
Every surface in a bathroom lives in a humid environment, so materials must be chosen accordingly: porcelain or ceramic tile for wet zones, quality vanities with moisture-resistant construction, and paint formulated for bathrooms. Large-format tile means fewer grout lines to maintain, and mid-range porcelain that mimics marble delivers the luxury look without the upkeep natural stone demands. Trend-proof the big surfaces by keeping them neutral and timeless, then bring in personality through hardware, mirrors, and textiles you can change in an afternoon.
Phase 3: The Details That Make It Feel Like a Retreat
9. Build In Comfort Upgrades While the Room Is Already Open
Some upgrades cost a fraction as much during a renovation as they would afterwards, because the floors and walls are already open. The ones our Toronto clients consistently say were worth it: heated floors under tile, a curbless walk-in shower with a built-in niche, a double vanity with drawer outlets for grooming tools, and blocking behind the shower walls so grab bars can be added easily in the future. These touches turn a functional bathroom into the spa-like main bathroom the whole renovation was about, and features like curbless showers also future-proof the space for aging in place.
10. Hire the Right Team and Insist on a Clear Written Scope
A main bathroom renovation coordinates plumbers, electricians, tilers, waterproofers, and glass installers in a tight sequence. The contractor you choose matters more than any product you buy. Verify licences and insurance, ask for recent bathroom-specific references, and get a written contract that spells out the scope, payment schedule, timeline, and how changes are priced. A realistic timeline for a full main bathroom renovation is roughly three to six weeks of construction once materials are on site, so be skeptical of anyone promising dramatically less.
It also pays to know the most common failure points before you start. We have collected them in our post on mistakes to avoid when renovating your bathroom so you can spot the warning signs early.
Quick Pre-Renovation Checklist
Before demolition day, confirm you can check every box:
- Layout approved with real measurements and door swings verified
- Budget set with a 15 to 20 percent contingency
- Permits obtained and condo board approval secured, if applicable
- All materials selected, ordered, and delivery dates confirmed
- Waterproofing method and ventilation plan documented in the contract
- Written contract signed with scope, timeline, and payment schedule
- A second bathroom or alternative arranged for the construction period
Frequently Asked Questions About Main Bathroom Renovations
How long does a main bathroom renovation take?
Most full main bathroom renovations take three to six weeks of construction once materials are on site. Add two to six weeks beforehand for design, permits, and material lead times. Condo projects can run longer because of board approvals and restricted working hours.
What should I renovate first in a main bathroom?
Always start with what is behind the walls: plumbing, electrical, waterproofing, and ventilation. Finishes come last. Renovating in the wrong order means tearing out new work to fix old problems.
Do I need a permit to renovate a bathroom in Toronto?
You need a building permit if you move plumbing fixtures, alter drains or vents, change electrical circuits, or modify walls. Purely cosmetic updates such as new tile, a new vanity in the same location, or repainting typically do not require one. Condo renovations also need board approval regardless of permits.
Is a tub or walk-in shower better for a main bathroom?
It depends on how you live and your home’s mix of bathrooms. If another bathroom in the house has a tub, replacing the main bathroom tub with a generous walk-in shower usually adds daily convenience without hurting resale. If it is the only tub in the home, keeping one is safer for future buyers, especially families with young children.
What adds the most value in a bathroom renovation?
Buyers respond most to a modern walk-in shower with quality glass, a clean double vanity, good lighting, and visible signs of quality workmanship. In the Canadian market, bathroom renovations typically recover 75 to 100 percent of their cost at resale, and the main bathroom carries the most weight in that impression.
Plan Your Main Bathroom Renovation with Toronto’s Bathroom Experts
A successful renovation is decided in the planning phase, and that is where the right partner earns their fee many times over. renoWOW! has designed and built bathroom renovations across Toronto for over 32 years, with spa-inspired bathroom packages starting at $9,999, superior finishes, and guaranteed timelines. As a full-service provider of home renovation services in Toronto, we manage every trade, permit, and detail under one roof, so your project moves from design to final walkthrough without the stress.
Call 866-352-1251 or book a free consultation today, and let’s plan a main bathroom you will look forward to every morning.